How to Make a Photo Look Like a Colored Pencil Drawing Upload
Learn how to easily plough whatsoever photo into a black and white pencil sketch with Photoshop, and and then learn three bang-up ways to colorize the sketch!
Version notation: This tutorial is for Photoshop CC 2019 and before. An updated version is bachelor for Photoshop 2020 and 2021.
In this tutorial, we'll larn how to easily create a archetype Photoshop consequence, turning a photo into a pencil sketch! In fact, we'll really learn how to create four variations of the sketch effect, starting with a simple black and white version. We'll then accept our blackness and white sketch and learn a few different ways to colorize it, first using the photo'due south original colors, and then with a single color, and then with a gradient!
We'll also larn how to keep our pencil sketch flexible and editable, letting us go back and fine-tune things as needed, past taking advantage of Photoshop's Smart Filters, fill up and adjustment layers, and layer blend modes.
This version of the tutorial is compatible with Photoshop CC 2019 and earlier, including Photoshop CS6. But Photoshop 2020 or 2021 users will want to cheque out my updated version which includes recent changes to Photoshop's gradients.
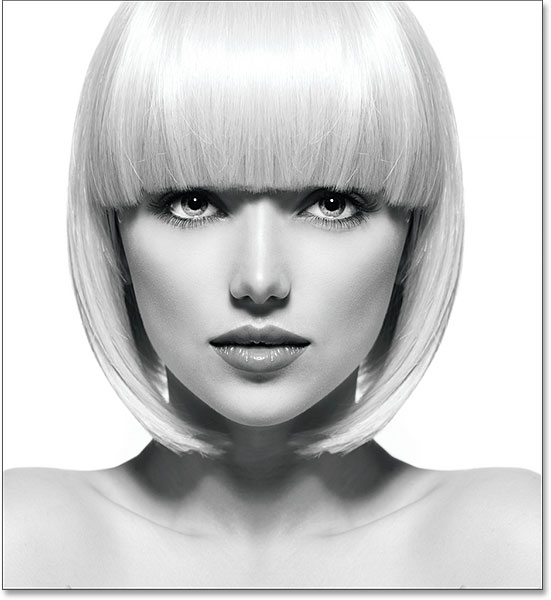
Here's the image I'll exist using (stylish beauty portrait photograph from Shutterstock):
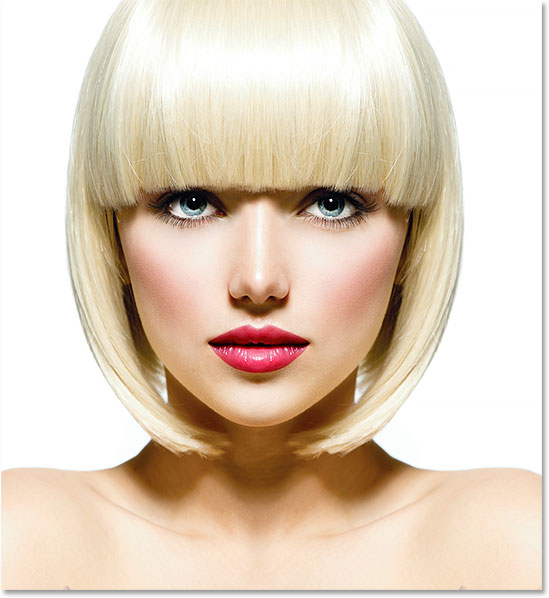
The original image.
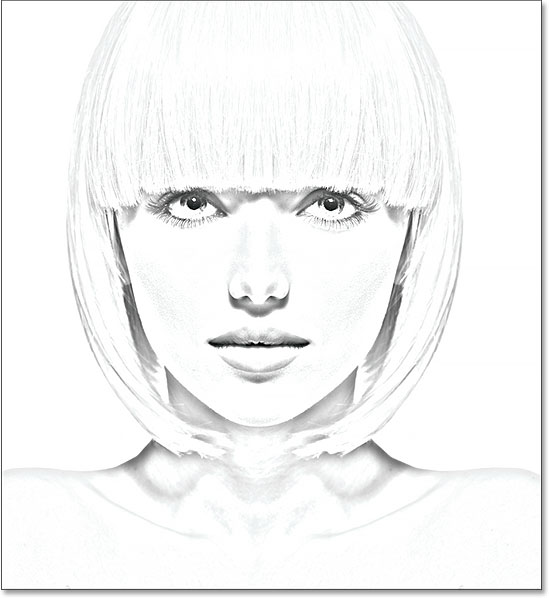
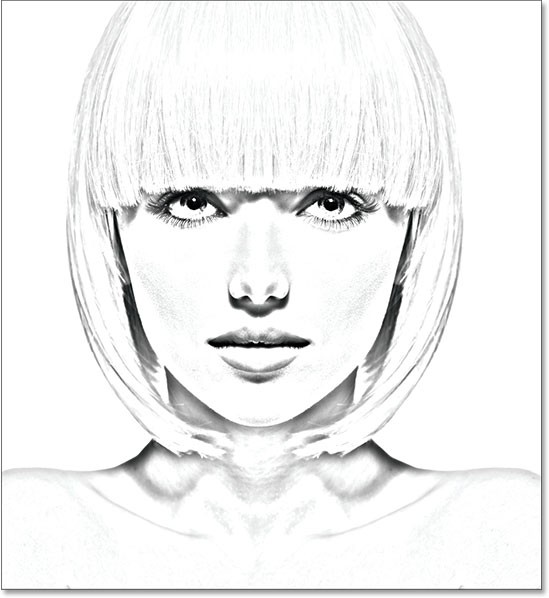
Hither's how information technology will look as the initial blackness and white sketch:
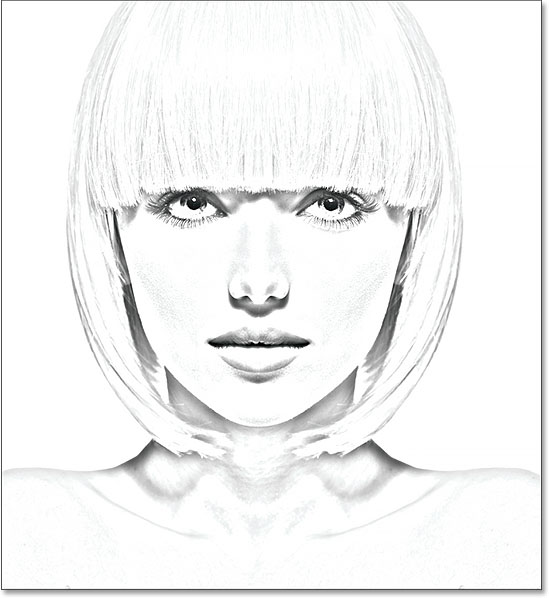
The black and white version of the sketch.
Here's the same sketch colorized with the photo's original colors:
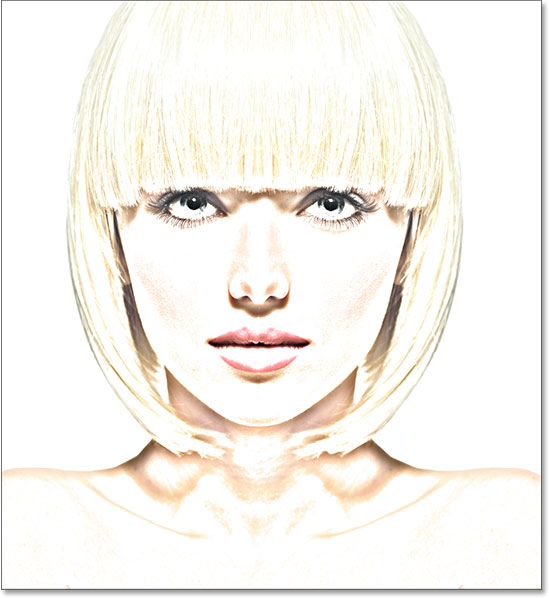
The first colorized version of the sketch.
Here'due south the same sketch once more, this time colorized with a single colour (you can cull whatever color yous like):
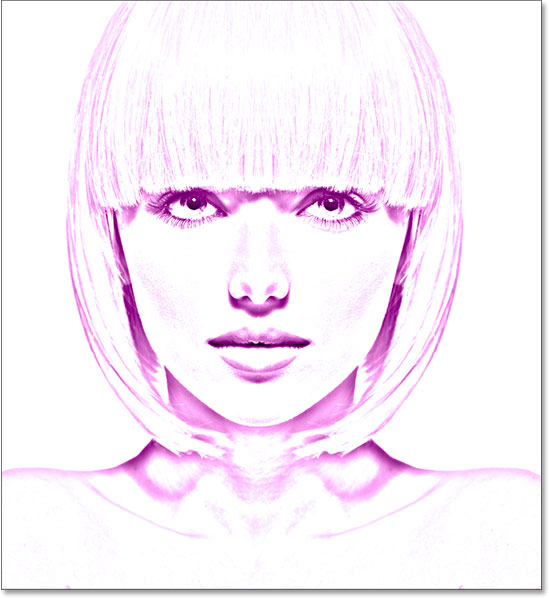
The second colorized version of the sketch.
And finally, hither'south how the sketch will expect later colorizing it with a gradient. At the end of the tutorial, we'll see how to easily switch between all four versions so you can choose the one you lot like best:
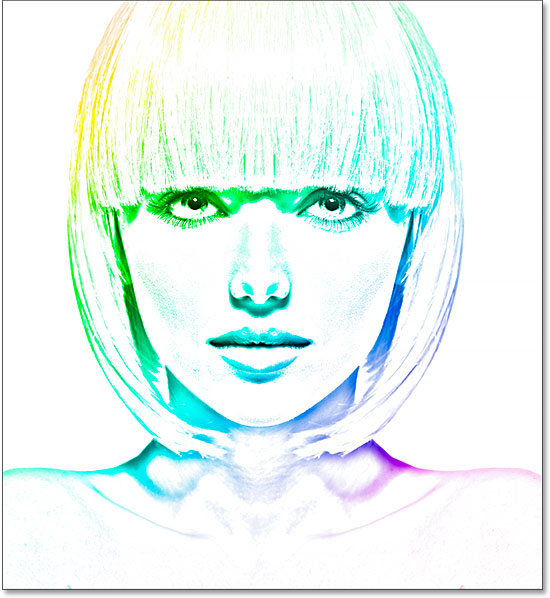
The third colorized version of the sketch.
Allow's go started!
How To Turn A Photograph Into A Pencil Sketch With Photoshop
Stride 1: Duplicate The Background Layer
With your image newly opened in Photoshop, if you look in your Layers panel, you'll see the paradigm sitting on the Background layer, currently the only layer in the document:
The Layers panel showing the photo on the Background layer.
We're going to demand this original paradigm again later when nosotros become to colorize the sketch, which means we'll demand to make sure we don't brand any changes to it. To keep information technology safe, the first thing we'll practise is make a copy of the image by duplicating the Background layer.
To practice that, click on the Background layer and elevate it down onto the New Layer icon at the bottom of the Layers panel (2d icon from the right):
Dragging the Background layer onto the New Layer icon.
Release your mouse button when your hand cursor is directly over the New Layer icon. Photoshop makes a copy of the Background layer, names it "Background copy" and places it to a higher place the original:
The Layers panel showing the new "Background copy" layer.
Step two: Desaturate The Layer
Next, we demand to remove all of the colour from our "Background copy" layer, and nosotros tin do that speedily using Photoshop'south Desaturate command. Go upward to the Image menu in the Card Bar along the elevation of the screen, choose Adjustments, and and then cull Desaturate. Y'all tin also use the keyboard shortcut Shift+Ctrl+U (Win) / Shift+Command+U (Mac):
Going to Image > Adjustments > Desaturate.
Either way desaturates the prototype, leaving us with a black and white version of our photograph:
The image afterwards desaturating the colour.
Step 3: Duplicate The Desaturated Layer
Next, we need to make a copy of our desaturated layer. Click on the Background copy layer in the Layers console and, only every bit we did with the original Background layer, drag it down onto the New Layer icon:

Dragging the "Groundwork copy" layer onto the New Layer icon.
When y'all release your mouse push button, Photoshop makes a copy of the layer, names it "Groundwork copy ii" and places it above the other layers:
The new "Background re-create 2" layer appears at the peak of the layer stack.
Step 4: Invert The Layer
We need to invert the brightness levels in this layer, making light areas dark and nighttime areas low-cal, and nosotros can practice that using Photoshop's Invert command. Get up to the Image menu at the elevation of the screen, choose Adjustments, and then cull Invert (keyboard shortcut: Ctrl+I (Win) / Command+I (Mac)):
Going to Image > Adjustments > Capsize.
This inverts the image, creating a picture show negative effect:
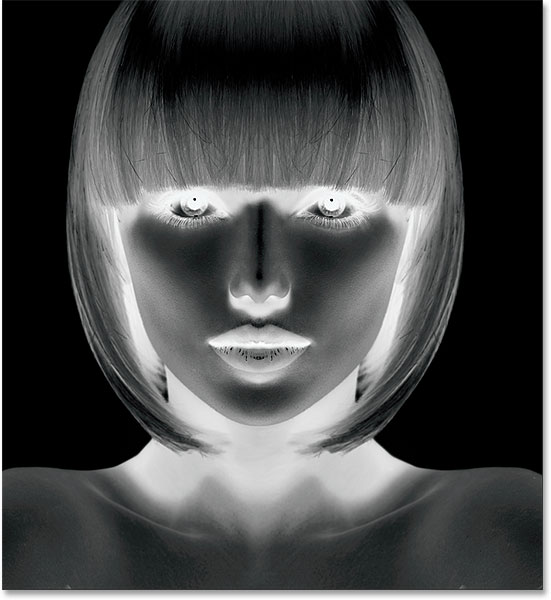
The epitome afterward inverting the brightness.
Step 5: Change The Alloy Fashion To Color Dodge
Adjacent, we demand to alter the alloy mode of the layer. You'll find the Blend Manner choice in the upper left of the Layers panel. By default, the alloy way is set to Normal. Click on the give-and-take "Normal" to bring up a menu of other blend modes and cull Color Dodge from the listing:
Irresolute the alloy mode of the layer from Normal to Color Dodge.
This will turn the document completely white, or at least mostly white (you may see a few scattered areas of black depending on your epitome):
Changing the blend way to Colour Contrivance turns the document temporarily white.
Step 6: Convert The Layer Into A Smart Object
In a moment, nosotros're going to create the primary part of our sketch effect by blurring the layer using Photoshop's Gaussian Blur filter. But rather than applying it as a normal filter, let's utilise Gaussian Mistiness as a Smart Filter.
What'south a Smart Filter, and how is it different from a normal filter? Well, Smart Filters are simply like normal filters in Photoshop, only smarter! What makes them "smarter" is that while normal filters produce static results (that is, they make permanent changes to the pixels on a layer), Smart Filters are non-subversive and remain fully editable. They allow us to hands get back at any time and make changes to the filter'south settings without whatsoever loss of image quality. By applying Gaussian Blur as a Smart Filter, we're giving ourselves the option to get back and fine-tune our sketch effect later on rather than locking ourselves in with our initial filter settings.
Then how do nosotros apply Gaussian Blur as a Smart Filter? For that, we showtime need to convert the layer to a Smart Object. Why do we need to catechumen it into a Smart Object? It's considering, when a filter is applied to a normal layer, it remains a normal, static filter. Just when the verbal same filter is applied to a Smart Object, information technology automatically becomes a Smart Filter!
To convert the layer into a Smart Object, click on the small bill of fare icon in the upper right corner of the Layers panel:
Clicking the Layers console carte du jour icon.
And then choose Convert to Smart Object from the menu that appears:
Choosing the "Catechumen to Smart Object" command.
It may not seem like anything has happened, simply if we look over again in the Layers panel, we now meet a small Smart Object icon in the lower correct corner of the layer's preview thumbnail. This tells us that the layer is at present a Smart Object:
The Smart Object icon in the layer's preview thumbnail.
Step 7: Employ The Gaussian Mistiness Filter
Now that nosotros've converted the layer into a Smart Object, let'due south apply the Gaussian Mistiness filter. Go upwardly to the Filter carte in the Carte Bar along the top of the screen, choose Blur, and then cull Gaussian Blur:
Going to Filter > Blur > Gaussian Blur.
This opens the Gaussian Blur dialog box. To create our chief sketch event, all nosotros need to do is utilize some blurring to the layer (the Smart Object). Nosotros control the amount of blurring using the Radius slider forth the bottom of the dialog box. The further we drag the slider towards the correct, the more we increase the radius value and the stronger the blurring will announced.
The event you accomplish will depend on how much blurring you've practical. Lower radius values will create a sketch with fine, sparse lines, while larger values will give y'all a more than photograph-realistic issue. For example, if I choose a fairly low radius value of around 10 pixels:
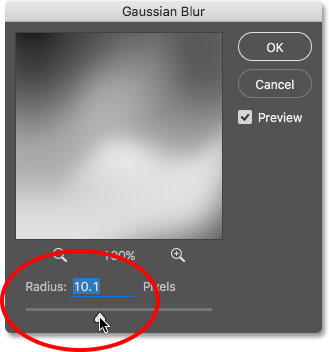
Starting with a lower radius value.
I end up with this effect hither with very fine lines:
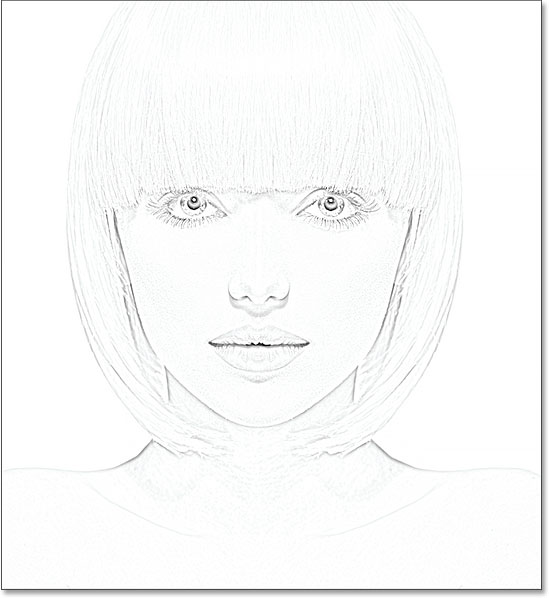
The sketch effect using a lower radius value.
If I increase the radius value to something much college, maybe somewhere effectually 45 pixels:
Increasing the radius value for a stronger blur issue.
I cease up with an outcome that looks more than like the original photo. The exact radius value you cull will depend both on your image and the type of effect yous're going for, and then the all-time thing to practice is keep an eye on your prototype as you elevate the Radius slider and guess the results. In my case, even though I like both versions, I think I similar this second, more photo-realistic version a scrap better, then I'll get with this 1. Click OK when you lot're done to shut out of the Gaussian Mistiness dialog box:
The sketch effect with a larger radius value.
We have our main sketch effect, and we created it using a Gaussian Blur Smart Filter. As I mentioned before, Smart Filters remain fully editable, allowing us to easily become back and change the filter's settings later on if needed. How exercise we practise that? Well, if nosotros look over again in the Layers panel, we now see the Gaussian Blur filter listed as a Smart Filter below the Smart Object we applied it to. If, at any point, you start thinking that your sketch could employ a bit more fine-tuning, simply double-click directly on the words "Gaussian Mistiness" to re-open up the Gaussian Mistiness dialog box and drag the Radius slider as needed:
Double-clicking the Gaussian Mistiness Smart Filter will re-open its dialog box.
Step 8: Add A Levels Adjustment Layer
We've created our main sketch effect, but depending on how much blurring you practical, you may be finding that your sketch is looking too light. If that'due south the case, we tin hands darken it using a Levels adjustment layer. To add together a Levels adjustment layer, click on the New Fill up or Adjustment Layer icon at the bottom of the Layers console:
Clicking the New Fill or Adjustment Layer icon.
Cull Levels from the list that appears:
Choosing a Levels aligning layer.
Photoshop adds a Levels adjustment layer, names information technology "Levels ane", and places it above the other layers in the Layers panel:
The Layers panel showing the new Levels aligning layer.
Step 9: Change The Layer Blend Way To Multiply
The options and controls for the Levels adjustment layer appear in Photoshop's Backdrop panel, but there's nothing here that we need to practice with them. Instead, to darken the sketch, all we need to do is alter the blend style for the Levels aligning layer from Normal to Multiply:
Irresolute the blend mode of the adjustment layer to Multiply.
The Multiply blend manner is i of a group of alloy modes in Photoshop that darken the image, and right away, we see that my sketch now appears much darker:
The effect afterwards changing the Levels blend mode to Multiply.
If you find, as I practise, that your sketch now appears too night, you can fine-tune the amount of darkening by adjusting the opacity of the Levels adjustment layer. Y'all'll detect the Opacity pick directly beyond from the alloy mode option at the top of the Layers panel.
The more you lower the opacity value below its default 100%, the more than the layers beneath the Levels adjustment layer will show through, brightening the sketch back up. I'll lower mine down to around 40%, just keep an center on your image as yous suit the opacity to find the value that works best:
Lowering the opacity of the Levels adjustment layer.
Subsequently lowering the opacity, the overall brightness is now looking amend:
Lowering the opacity brought dorsum some of the effulgence.
Step 10: Duplicate The Background Layer Once more
At this point, nosotros have our primary sketch event, but currently it's in black and white. Let's look at a few different ways to colorize it. We'll start by using the photo'south own original colors. For that, we need to make another re-create of the Background layer, then click on the Background layer (the original Background layer that'southward sitting below the other layers) and, but as we've done a couple of times already, elevate it downward onto the New Layer icon at the bottom of the Layers panel:
Making another re-create of the Background layer.
Photoshop makes a re-create of the layer, names information technology "Background copy 3" and places information technology directly above the original Background layer:
The "Background copy 3" layer appears above the original Background layer.
Step xi: Rename The New Layer
We've created and so many copies of our Background layer at this point that our Layers panel is becoming chaotic with them, and they all have names ("Background copy", "Groundwork copy two", "Background copy 3") that don't tell united states of america anything about what the layer is being used for. Permit's pause the cycle and rename the layer we merely created.
We're going to be using the "Groundwork copy 3" layer to colorize our sketch, so let's requite it more descriptive name. To rename a layer, double-click direct on its name to highlight it:
Highlighting the current proper name by double-clicking on it.
With the name highlighted, type in the new proper name. Allow's proper noun it "Color". Press Enter (Win) / Return (Mac) on your keyboard when you're washed to accept the name alter:
Changing the layer's name to "Colour".
Step 12: Move The "Colour" Layer To The Top Of The Layer Stack
To utilise this layer to colorize the sketch, we need to motion it up to the top of the layer stack; in other words, move information technology above all the other layers. One way to practise that would be to click on it and simply drag it up higher up the other layers, but there's a faster fashion. To bound a layer directly to the top of the layer stack, first brand sure it's selected in the Layers panel. And so, printing and agree Shift+Ctrl (Win) / Shift+Command (Mac) on your keyboard and press your right subclass central ( ] ). This will instantly jump the selected layer straight to the top:
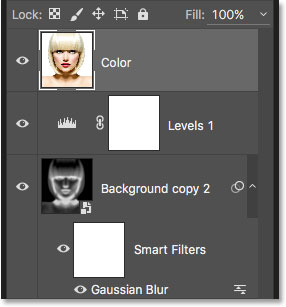
The "Color" layer at present sits at the top of the layer stack.
Footstep 13: Change The Alloy Manner To "Color"
With the "Color" layer now the top-most layer in the document, your original image will re-announced, blocking the other layers beneath it from view, which is obviously non what we desire. We desire to alloy the color from the original image in with our sketch. To do that, simply alter the blend mode of the "Colour" layer from Normal to Color:
Changing the blend style of the layer to Color.
The Color blend style tells Photoshop to blend just the colour from this layer and ignore everything else, and only like that, the sketch is now colorized:
The sketch colorized with the photo's original colors.
If the color appears too stiff, you can reduce information technology by lowering the opacity of the "Color" layer. I'll lower mine downwards to 50%:
Lowering the opacity of the "Color" layer.
And now, the colour appears more than subtle:

The effect after lowering the opacity of the "Colour" layer.
Acquire More: The 5 Layer Blend Modes You Need To Know
Step xiv: Turn Off The "Colour" Layer
If yous like the way your sketch outcome looks using the photo's original colors, you can finish here. Otherwise, let's await at a second way to colorize it, this fourth dimension using a unmarried colour. Before we do, permit's turn off the "Colour" layer by clicking its visibility icon (the "eyeball" icon) in the Layers console. This will bring back the black and white version of the sketch:
Turning off the "Color" layer by clicking its visibility icon.
Step 15: Add together A Solid Color Fill Layer
To colorize the sketch with a single color, we'll utilize one of Photoshop's Solid Color fill up layers. Click over again on the New Make full or Adjustment Layer icon at the bottom of the Layers panel:
Clicking the New Fill or Adjustment Layer icon.
Then cull Solid Color from the top of the list that appears:

Choosing a Solid Color fill layer.
Every bit soon as you select the Solid Color fill up layer, Photoshop will pop open the Color Picker, request y'all to choose your color. Don't worry most choosing the wrong color here considering, as we'll meet in a moment, we tin can easily come back and pick a different one. I'll choose a shade of blue to run into what that looks like:
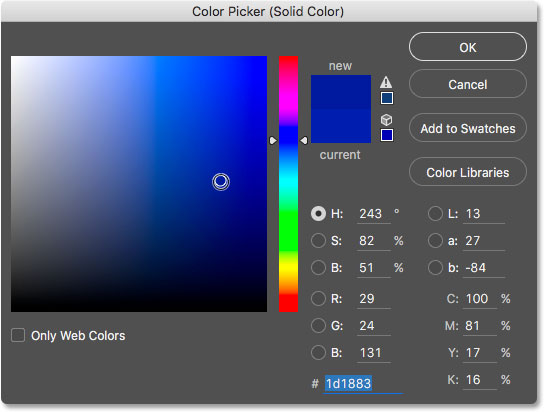
Choosing blueish from the Color Picker.
Step xvi: Alter The Alloy Way To Color
One time you've chosen a color, click OK to shut out of the Color Picker. Your document will temporarily exist filled with that colour, and if yous expect in the Layers panel, you'll see the new make full layer, named "Color Fill one", sitting at the height.
To blend the color in with the sketch, but change the fill layer'southward blend mode from Normal to Color:
Changing the fill layer'south blend mode to Color.
And now, the sketch appears colorized, in my instance with bluish:
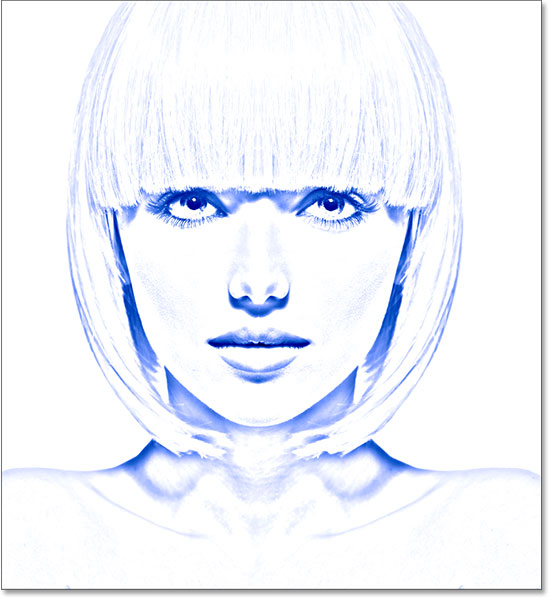
The sketch colorized with bluish.
If you want to try a different colour, double-click on the fill up layer's color swatch in the Layers panel:
Double-clicking the make full layer'due south colour swatch.
This re-opens the Color Picker, allowing y'all to cull something unlike. I'll try a pink-majestic this time:
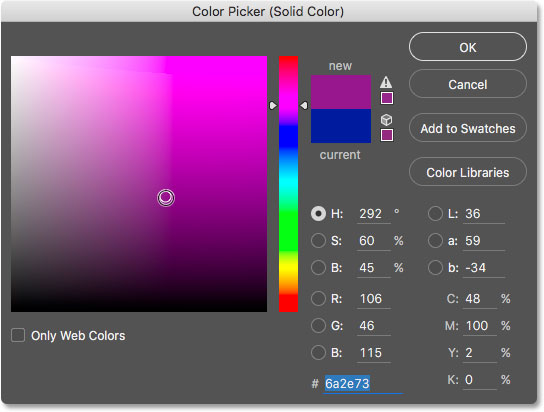
Choosing a unlike color from the Colour Picker.
I'll click OK to close out of the Color Picker, and now my sketch appears with my new color. You lot can go dorsum and effort as many different colors equally you like until you find the one that works best:
The sketch colorized with majestic.
To reduce the intensity of the colour, simply lower the fill layer's opacity, keeping an eye on the results as you drag the slider:
Lowering the opacity of the make full layer.
Stride 17: Turn Off The Fill Layer
Let'south expect at 1 more way to colorize the sketch, this time using a gradient. Commencement, turn off the fill layer by clicking on its visibility icon in the Layers console. This will once over again return you to the black and white version of the sketch:
Clicking the fill layer'due south visibility icon.
Step 18: Add together A Gradient Make full Layer
To colorize the sketch with a slope, nosotros'll use a Gradient fill layer. Click once again on the New Fill up or Adjustment Layer icon at the bottom of the Layers console:
Clicking the New Fill or Aligning Layer icon.
This time, cull Gradient from the list:
Choosing a Gradient fill layer.
This opens the Gradient Fill dialog box. I covered everything y'all demand to know most cartoon and editing gradients in Photoshop in our How To Depict Gradients With The Gradient Tool and How To Employ The Slope Editor tutorials and so I won't go into detail here. Instead, allow'south look at how to speedily select one of Photoshop's preset gradients and how to apply it to our sketch.
To choose a gradient, click on the small pointer to the right of the gradient color swatch at the acme of the dialog box. Don't click on the color swatch itself or you'll open the Gradient Editor which is beyond the scope of this tutorial. Make certain you click on the arrow to the right of the color swatch:
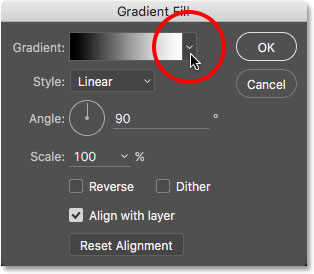
Clicking the pointer to the right of the slope color swatch.
This opens the Gradient Picker, showing united states of america thumbnails of preset gradients we can cull from. To select a gradient, double-click on its thumbnail. This will both select the gradient and close the Gradient picker. For this tutorial, I'll choose the Spectrum slope (first thumbnail on the left, lesser row):

Selecting the Spectrum gradient.
Back in the Gradient Fill up dialog box, I'll change the Angle of the gradient from its default 90° to 135°, which volition cause information technology to run diagonally across the prototype, creating a bit more interest:
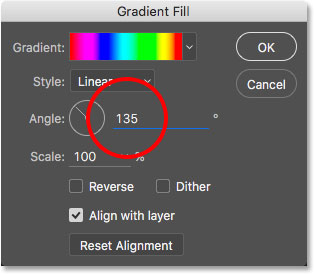
Changing the angle of the gradient.
Click OK to shut out of the dialog box when you're done. Your document will temporarily be filled with the gradient:
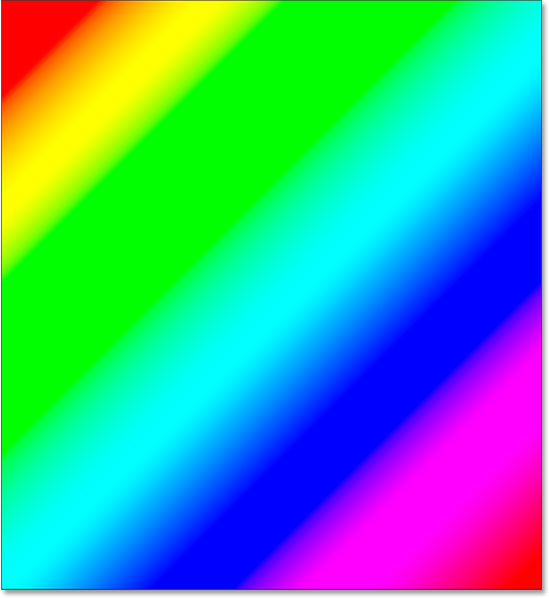
The slope temporarily blocks the sketch from view.
Step 19: Modify The Blend Mode To Color
If nosotros look in the Layers panel, we see the Gradient fill layer ("Gradient Fill one") sitting at the superlative. Simply every bit we've done a couple of times already, to alloy the slope in with the sketch, simply change the blend fashion of the Slope Fill layer from Normal to Color:
Irresolute the blend mode of the Gradient Fill layer to Colour.
And then, adjust the intensity of the colors if needed by lowering the layer's opacity:
Lowering the opacity of the Gradient Make full layer.
Hither's what my sketch looks like colorized with the Spectrum gradient:
The final colorized sketch effect.
Choosing One Of The Previous Color Effects
At present that we've colorized the sketch with a gradient, what if you like i of the previous colorized versions better (the ane using the photo's original colors or the i using the single color)? Or, what if you don't like whatsoever of the colorized versions and want to get back to the black and white version? How practise you switch back?
Information technology's easy. First, to hide the gradient, click on the Gradient Fill layer'south visibility icon in the Layers panel. With all three colorizing layers (the "Color" layer, the Solid Color fill up layer and the Gradient Fill layer) now turned off, y'all'll be dorsum to your black and white version:
Clicking the Slope Fill layer'south visibility icon.
Then, to bring dorsum the single colour version, click on the Solid Colour fill layer'due south visibility icon (the empty square where the eyeball used to be) to plow it dorsum on. Or, to bring back the photo'southward original colors, click the "Color" layer's visibility icon. I'll plough my "Color" layer back on:
Clicking the "Color" layer'due south visibility icon.
And now I'm dorsum to my sketch being colorized with the photograph's original colors:
The original colors return.
And there we have it! That's how to easily turn a photo into a blackness and white pencil sketch, along with a few dissimilar ways to colorize it, in Photoshop! If you found this tutorial helpful, please consider supporting Photoshop Essentials by downloading the PDF version! Check out our Photo Effects section for more than Photoshop effects tutorials!
Source: https://www.photoshopessentials.com/photo-effects/photo-to-color-pencil-sketch-with-photoshop-cc/
0 Response to "How to Make a Photo Look Like a Colored Pencil Drawing Upload"
Post a Comment